

how to draw a sheep face
Of all the farm-1000 animals, sheep are some of the cutest. With their fluffy wool coats, coal-black faces, and flared ears, sheep make the perfect subjects for drawing. In this tutorial, which is role of our farm animate being drawing serial, nosotros take you through all the well-nigh important steps to draw a realistic sheep. If y'all have been looking for the best tutorial to prove you how to depict a lamb, then you have come up to the correct place. Get together your cartoon supplies, find somewhere comfortable to piece of work, and let u.s.a. begin our sheep drawing!
Tabular array of Content
- ane Tutorial for How to Draw and Paint a Realistic Sheep
- ane.1 Footstep ane: Laying Down the Construction Lines
- 1.2 Step 2: Outlining the Sheep'south Chest
- one.3 Step 3: Drawing the Shape of the Caput
- 1.4 Step 4: Constructing the Ears
- 1.5 Footstep 5: Drawing the Shape of the Front end Legs
- 1.6 Stride half dozen: Creating the Shape of the Rump
- ane.seven Step seven: Fourth dimension to Draw the Back Legs
- ane.8 Step 8: Creating the Final Outline of Your Sheep Drawing
- 1.ix Stride nine: Creating Realistic Texture
- 1.10 Stride 10: Adding the Starting time Coat of Coloring
- 1.eleven Step 11: Blending Your Colors
- i.12 Step 12: Coloring the Remaining Body Parts
- 1.13 Pace 13: Adding Highlights to Your Sheep Cartoon
- ane.14 Step 14: The Finishing Touches
- ii Frequently Asked Questions
- 2.one Is Information technology Easy to Learn How to Describe a Sheep?
- 2.2 How Can You Perfect the Realism in a Sheep Drawing?
Tutorial for How to Describe and Paint a Realistic Sheep
In all of our farm animal drawing tutorials, nosotros aim to help you achieve the most realistic drawing in a few like shooting fish in a barrel-to-follow steps. You can follow along with us and learn all of our best tips and tricks for creating and coloring a lamb sketch. From laying downwardly structure lines to calculation details to the face and wooly coat, y'all can find everything that yous demand to know in this sheep drawing tutorial. Y'all can run into an outline of all the steps we are going to take in the collage below.

As with all of our tutorials, you can create your lamb drawing in any medium. Whether you dearest to use a drawing tablet, or y'all prefer to work with watercolor pencils or paints, information technology is very like shooting fish in a barrel to accommodate our sheep drawing tutorial to adapt your needs.
Now that you have gathered your drawing supplies and are ready to acquire how to draw a lamb, let united states of america swoop correct in!
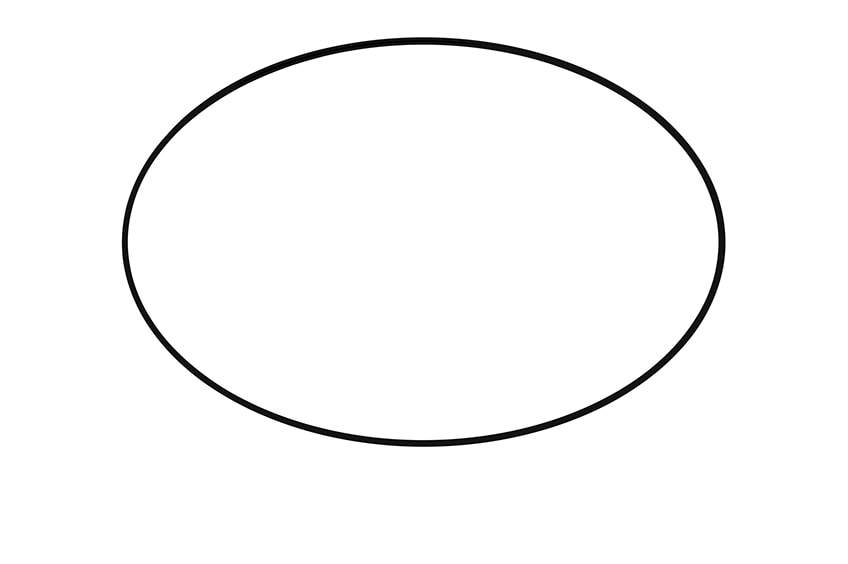
Step 1: Laying Downwards the Structure Lines
In all of our cartoon tutorials, we begin by using construction lines and shapes to lay down the bones shape of our animate being. We notice that using construction lines is the most reliable way to ensure that you have the correct proportions and shapes before you begin calculation the fourth dimension-consuming details. In this first step, nosotros are using a single oval shape to construct the general shape of the sheep'due south master body. Yous practise not desire this oval to be too elongated, as sheep have fairly round bodies.
The most important thing to ensure in this commencement step is that your principal body oval sits in the center of your canvas with plenty of space on all sides. In the next few steps, we will be calculation the legs and caput which need space.
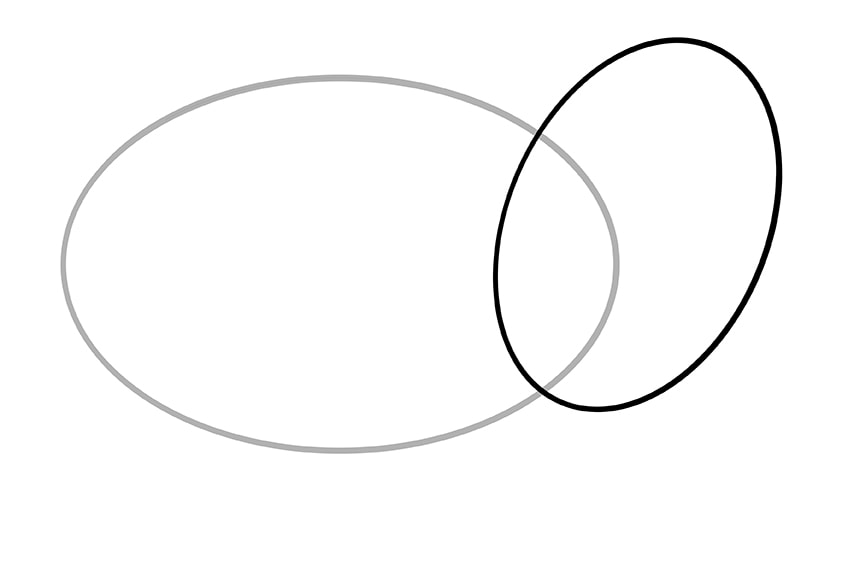
Footstep 2: Outlining the Sheep's Chest
If you wait at the final result of this tutorial, you will run across that the sheep'south caput does non simply extend from the front end of its body. Sheep have a fairly long neck and a large breast, which nosotros need to lay down with construction lines in this stride. Y'all are going to use another oval, just this fourth dimension it should be slightly smaller and more elongated. Draw the angled oval shape overlapping with the very front tip of the main body oval.
Yous want this oval to lean towards the right side of your sheet, and the top of it should sit down a niggling higher than the highest point of the principal body oval.
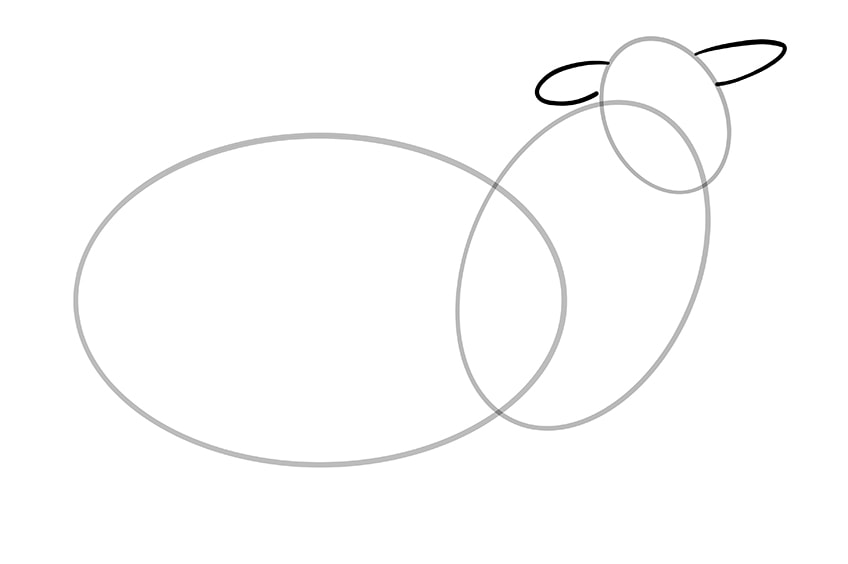
Stride three: Cartoon the Shape of the Head
At present that we have laid downward the chest area which connects the sheep's body and head, we tin can draw the construction shape for the head. For the head, y'all want to use a much smaller oval shape and place it at the top of the chest oval.
This oval should be angled towards the left, opposite to the breast oval.

Step four: Constructing the Ears
In this quaternary step, we are nonetheless focusing on construction shapes, so you are going to utilise two very simple shapes to lay down the sheep's ears. On either side of the top of the head oval, draw ii incomplete oval shapes extending from the head. Although these are but construction lines so y'all do not have to be too precise about their shape, it is important to note the difference in shape and length between them.
If y'all wait at our example beneath, you lot will meet that the ear on our right is longer and more pointy than the left. The reason for this is perspective. The ear to our left is extending slightly frontwards, while the right is going straight outwards.
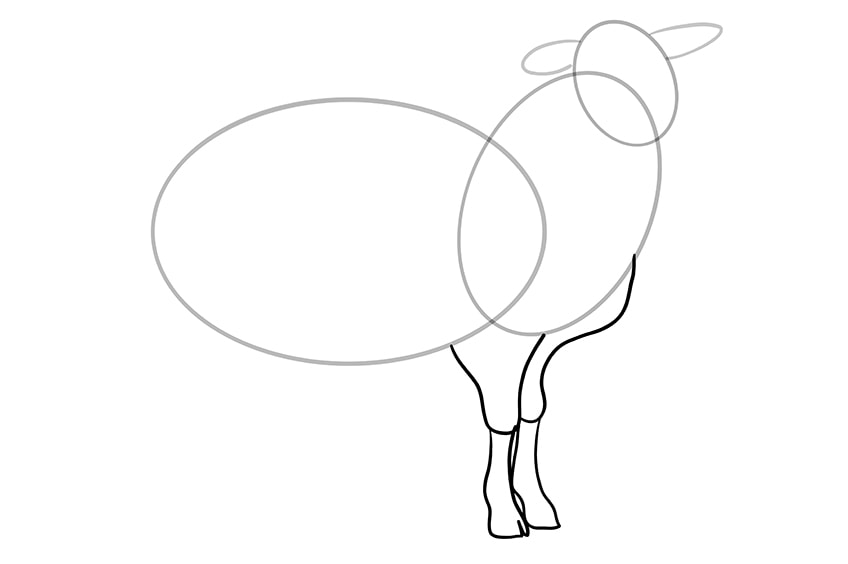
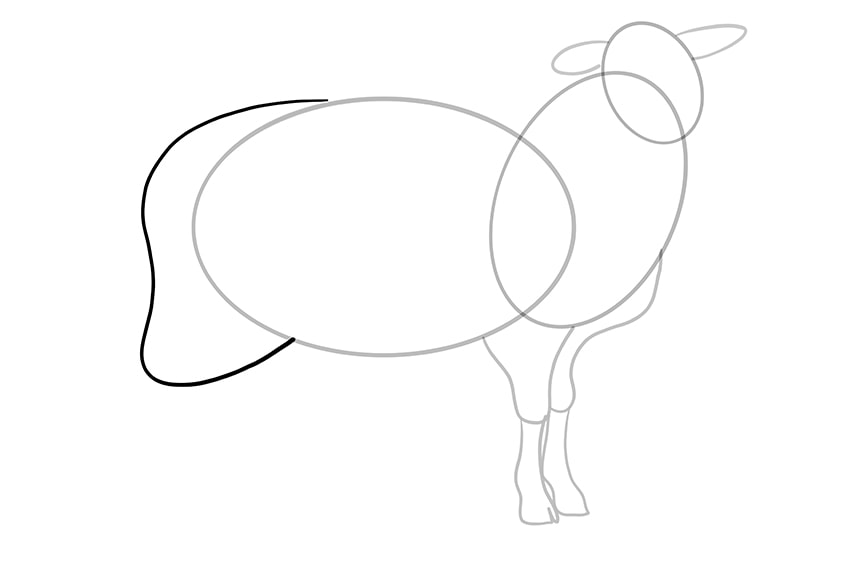
Footstep 5: Drawing the Shape of the Front end Legs
Upward until now, all of our construction shapes have been ovals or shapes like ovals. In this step, we are going to create more freehand construction lines to lay downwards the shape of the sheep'southward front legs. Brainstorm but below the halfway point of the front end of the chest oval, and have a line downwardly to create the thigh of your sheep drawing. When this line becomes level with the lesser of the chest oval, y'all tin can create a rounded 90-degree turn to the left and then curve the line down to create the upper part of the front leg. For the second leg, take a U-shaped line downwards from the lesser of the chest oval and finally joining with the bottom of the main torso oval.
Finally, from the bottom of each thigh, create ii elongated hooves, with a heel bump at the back and a sight signal at the front. For added realism, you lot can add a little slit at the very front of the second hoof.
Pace half dozen: Creating the Shape of the Rump
At this stage, you tin probably kickoff to see the last shape of the sheep drawing coming together. In this step, we are going to create the shape of the back cease of the sheep. Sheep have quite square rumps, and so you are going to begin cartoon a line from just behind the elevation of the chief body oval. Have this line backward, before curving down and dorsum slightly towards the back point of the main body.
Finally, end the back of your sheep by curving this line out again quite sharply, and so bringing it back up to see the lesser of the main torso.
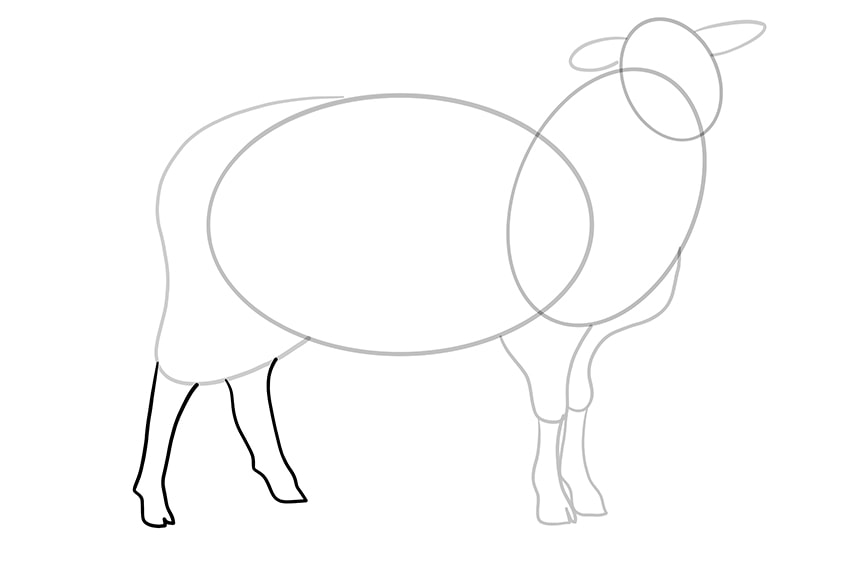
Step vii: Time to Draw the Back Legs
In step 7, nosotros are going to create the outline for the two back legs of your lamb drawing. Begin with the very back foot, taking a line down from the very back and bottom betoken of the rear end. Y'all can create a like hoof shape at the bottom, with a slightly more pointy heel and a divide in the front. For the second back leg, commencement on the inside and bottom of the rear end, and draw the last hoof angled slightly towards the front of the sheep'due south trunk.
To blast a realistic perspective in your sheep drawing, both of the back legs should kickoff on the line of the rear terminate, as they are poking out from beneath the wool coat. The very back leg should as well be angled slightly towards the dorsum of your canvas, and both hooves should point towards the front.
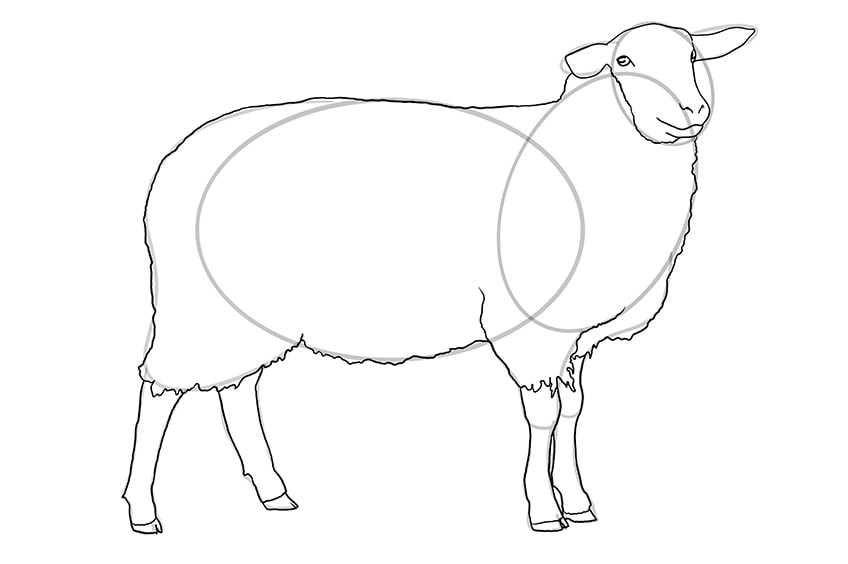
Step 8: Creating the Last Outline of Your Sheep Drawing
Up to this point, most of our drawing has been purely structure. In this step, it is time to necktie together all of our structure lines to create the final outline of your lamb drawing. Brainstorm past outlining the shape of the sheep's head.
If y'all take a await at our example beneath, yous will run into that the sheep'south head is not an oval like the construction shape. Bring the sides of the face slightly inwards, and then create a slightly squared-off nose.
For the left ear, carry the caput outline around the ear without separation. To maintain the perspective, you need to utilise a line to separate the right ear from the space within the head. To finish the head outline, you can add together facial features including eyes shut to the ears, nostrils, and a small wiggly line for the mouth.
Utilize wavey and scribbly lines to outline the rest of the sheep's body to give the illusion of a wooly coat. Y'all tin follow your construction shapes very closely, just calculation a few raggedy bits of wool effectually the bottom of the torso. Lastly, add an additional line just above the lesser of the hooves to create more realistic detail.
When yous are happy with your outline, you can erase all remaining construction lines.
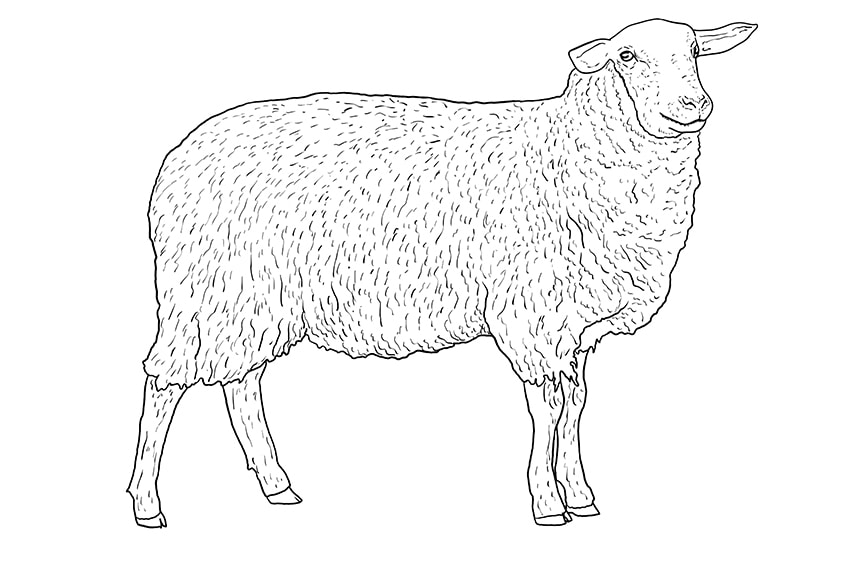
Footstep 9: Creating Realistic Texture
Although time-consuming, this step is fairly simple. Using short wavy lines, fill the entire torso of your sheep with a wool-like texture. These lines should not overlap each other, and the head, ears, and feet should be slightly less textured than the master torso.
To make sure that the fur of your sheep drawing is as realistic as possible, utilize the curvature of the outline to guide the direction of your lines. The lines should curve effectually the cervix and chest, and flow downward from the sheep'south back.
Pace 10: Adding the Beginning Glaze of Coloring
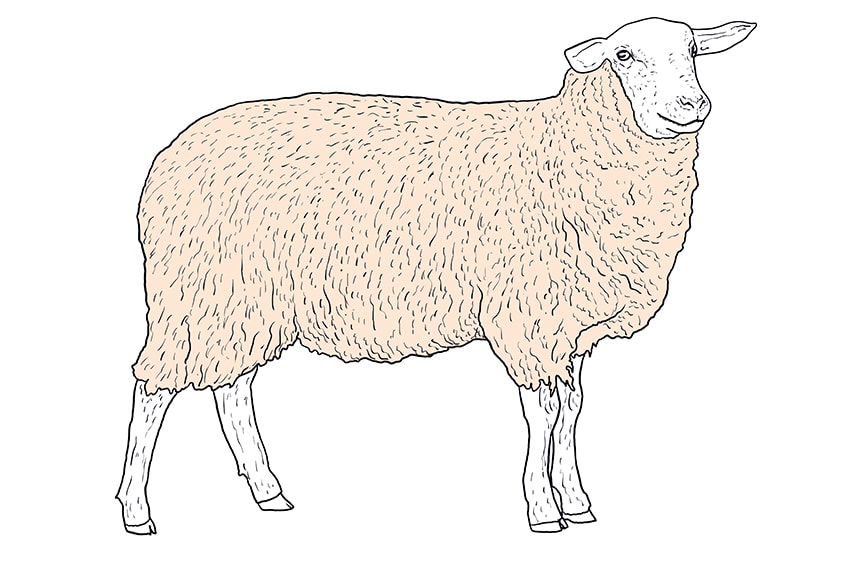
In order to create realistic coloring for any animal drawing, it is always all-time to build the color up in a few layers. Although sheep are white, we need to start with a neutral base color to create depth and dimension. Use a light tan shade of beige, and fill the entirety of the main body with this shade.
The head and feet are going to be black, so you tin get out these areas blank for at present.
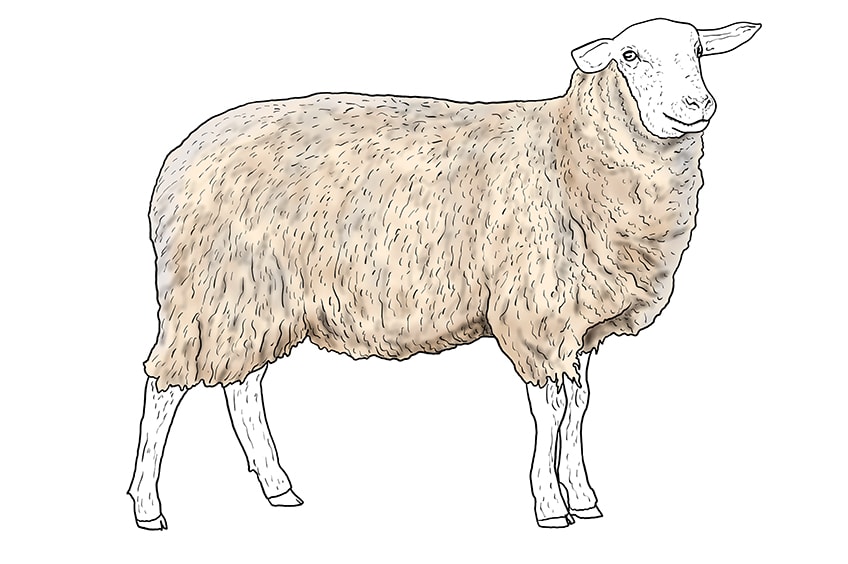
Stride 11: Blending Your Colors
In this step, you are going to demand shades of light brown and black to create dissimilar patches in the wooly coat. Begin by painting some patches of light dark-brown throughout the sheep's body. You tin can so get in with just a touch of blackness paint and darken some of these patches. The most effective coloring method is to lightly dab the color onto the sheep'due south torso without blending it too much.
In order to emphasize realistic perspective, y'all desire to focus your darker colors along the lesser of the sheep'southward trunk, below the head, and effectually the chest.
Step 12: Coloring the Remaining Body Parts
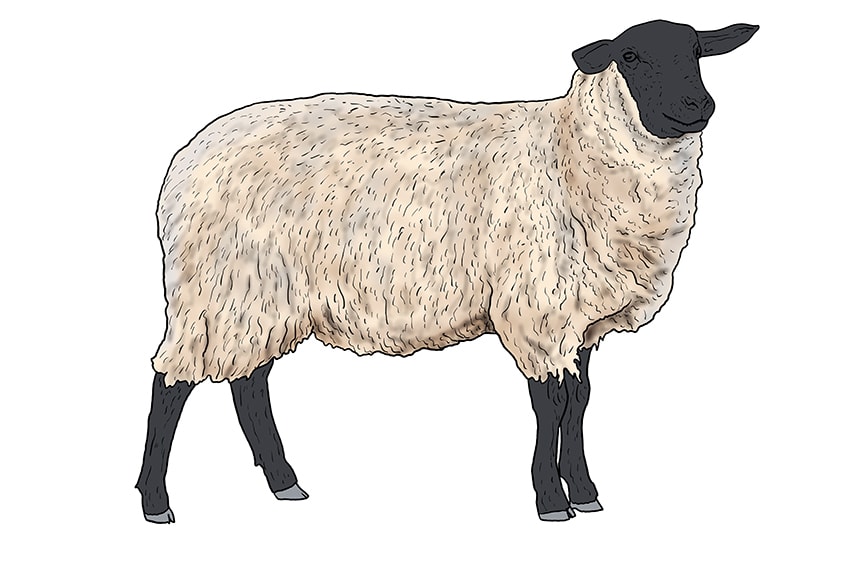
Using a dark greyness shade, color in the head and legs of your lamb sketch. The very bottom of the hooves should be slightly lighter than the rest of the legs and the caput, so use a light gray color to fill this area.
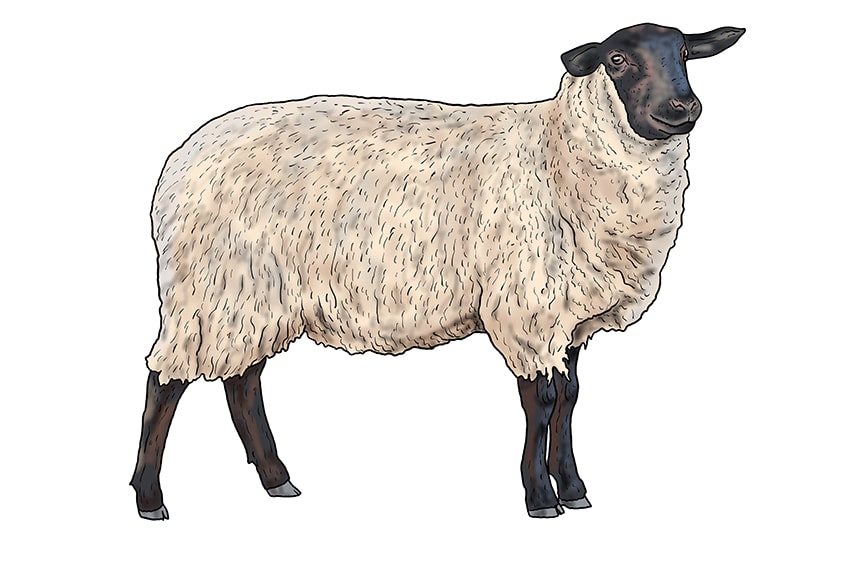
Step thirteen: Adding Highlights to Your Sheep Drawing
Shadows and highlights are fundamental tricks for creating realistic texture, depth, and perspective in any drawing. For this footstep, yous are going to demand a shade of white, tan, peach, and blue-greenish to add highlights to the darker parts of your sheep'south body.
Brainstorm by adding a touch of white pigment to the sheep's eyes, creating the glint of light reflecting in the iris. Next, use your tan shade and add a lilliputian shaping to the confront of your sheep, adding highlights to the places that sit down higher than others and would naturally catch the calorie-free. Focus some highlighting on the insides of the ears, and around the mouth and nostrils. For the lightest parts, employ your light peach shade to emphasize the highlights.
For the terminal part of this footstep, utilise your blue-green color to add together some further shading to the face and legs of your sheep drawing.
Step xiv: The Finishing Touches
This terminal step is optional, only it is a great fashion to level up the realism of your lamb sketch. In this step, you lot can remove the outline of your sheep drawing with one of two methods. If you tin can only erase the outline on your graphic tablet so you lot can cease your sheep drawing quickly. If you lot have used a more physical cartoon medium, yous can use your light tan color to paint over the outlines and erase them.
You can now add final details to your lamb drawing past using this tan shade to delicately trace the fur lines throughout the trunk.
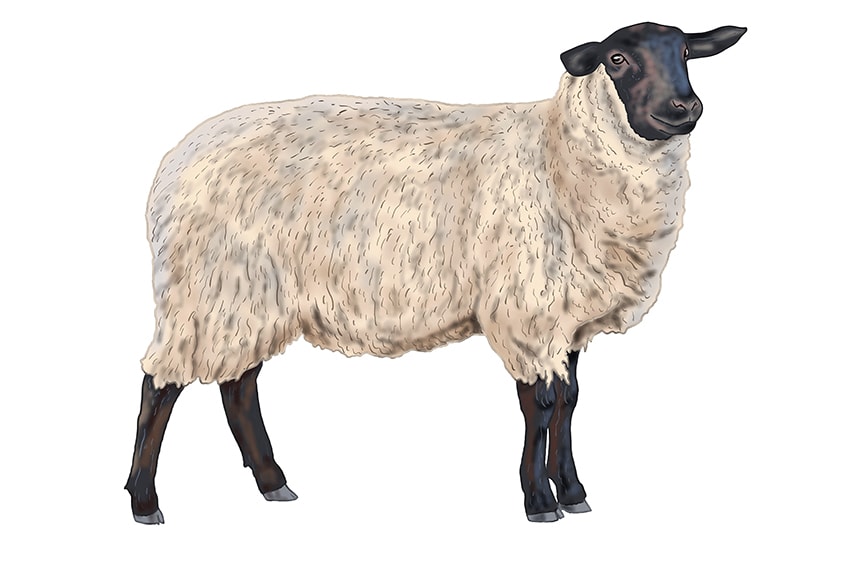
Congratulations on finishing our quick and like shooting fish in a barrel sheep cartoon tutorial. If you lot came into this tutorial wanting to know how to describe a sheep realistically, yous now know all the best tips and tricks for achieving maximum realism. Hopefully, y'all are happy with your last lamb drawing, and y'all are excited to depict some more farm animals.
Ofttimes Asked Questions
Is It Easy to Learn How to Draw a Sheep?
Drawing a sheep is really a very simple procedure when you break it downwards into a few steps. Our sheep drawing tutorial makes it very easy to learn how to draw a lamb.
How Tin can You Perfect the Realism in a Sheep Drawing?
The all-time manner to create a realistic sheep drawing is to focus on nailing the perspective and using highlights and shadows to create depth and dimension. Our easy lamb sketch tutorial gives you all the best tips and tricks for creating a realistic sheep drawing.

Source: https://artincontext.org/how-to-draw-a-sheep/
Posted by: vanburenenced1969.blogspot.com
0 Response to "how to draw a sheep face"
Post a Comment